Genome summary facilitates the analysis of organisms by creating a table view of selected organisms against curated or keyword-based lists of genes (universal lists and user-created lists) representing metabolic functions or other biologically relevant facts. Below are the steps for making a genome summary.
Step 1: Genome Summary Page
On the top menu, click on the Genome Summary link to go to the Genome Summary page.
Once you are on the page, click on the green “Create Genome Summary” button.
Step 2: Select Projects
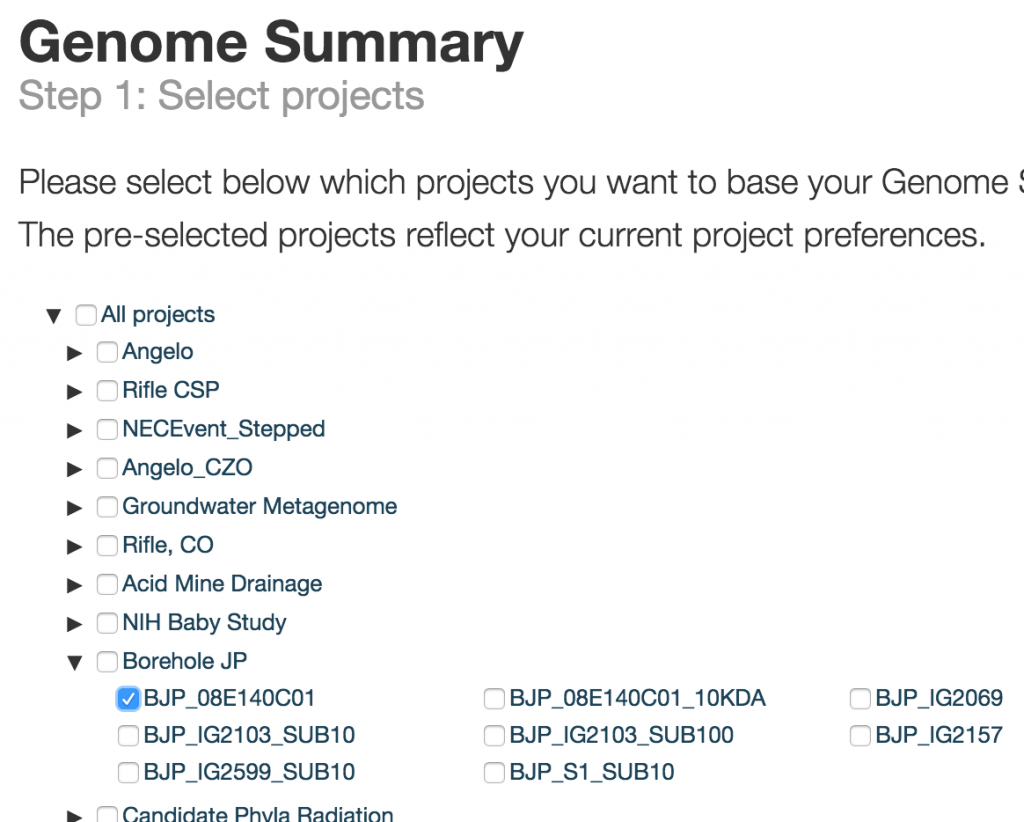
Select one or more projects that contain the organisms that you want to analyze.
After you have selected the projects, click on the blue “Go to Genome Summary” button on the bottom. You will then be taken to the next page where you can select organisms and lists. NOTE: Depending on the size of the projects, this may take awhile to load.
Note: it may take some time to load the new page if you have chosen many projects.
Step 3: Select Organisms
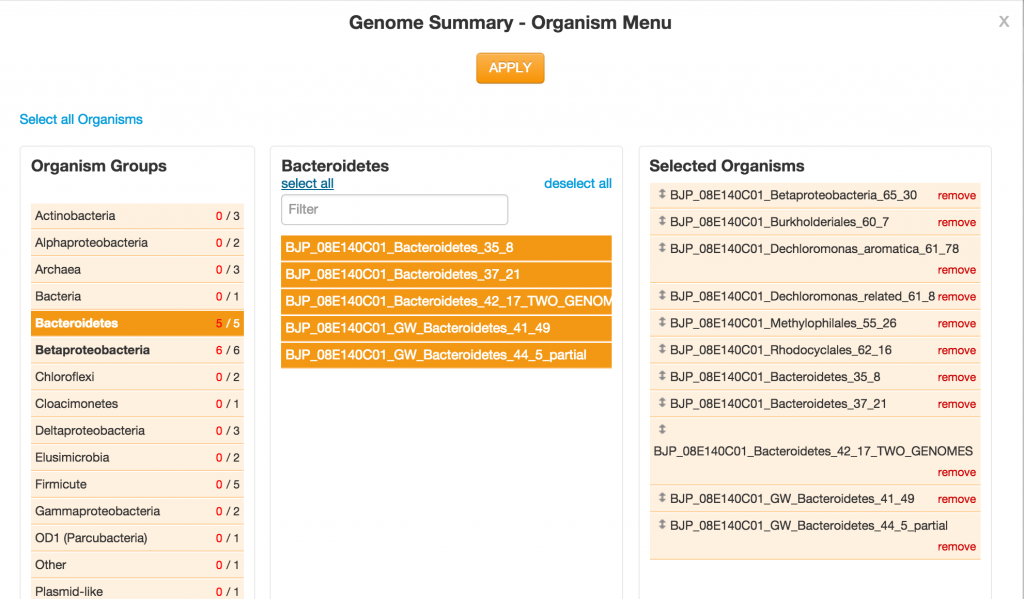
Click on the green “Select organisms” button. You will be presented with the menu for selecting which organisms to analyze. In the “Selected Organisms” panel, you can use drag and drop arrows to reorder them, such as by abundance.
Click the APPLY button after you are finished with your selection.
Step 4: Select Lists
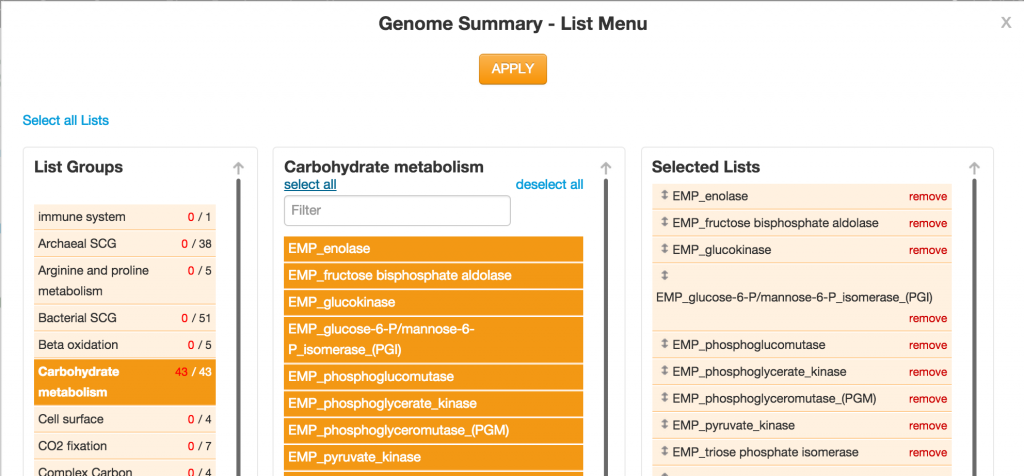
Click on the green “Select lists” button. You will be presented with the menu for selecting which lists to examine. Similarly, you can use drag and drop arrows to reorder the items in the “Selected Lists” panel.
Click the APPLY button after you are finished with your selection.
Step 5: Genome Summary Display and Features
Mouseover and Freeze
Once you have chosen the organisms and lists, your selections will be display as a table with the rows being the organisms and the columns being the lists of selected genes or genomic properties. When you mouse over the cells, more information about the organism and the list is displayed and highlighted. You may freeze a row or a column by clicking on their labels. In addition, when you are in the taxonomy view, you can click on the taxonomy bars on the left to freeze a number of rows of organisms at once.
View, Color, Cellsize
You can adjust the display of organism, the color scheme, and the cell size of a genome summary by changing the values in the dropdown menus.
Changing the View will change the arrangement and sort order of the organisms. Changing the Color will allow you to use different color schemes. Changing the Cellsize will allow you to zoom-in and zoom-out of the genome summary.
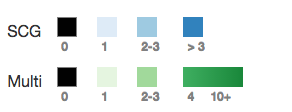
A color legend is provided to indicate the number of features in the organisms that belong to the selected lists. This information may enable you to analyze the characteristics of an organism.
Download Files
You may download the SVG or TSV files based on the Genome Summary that you have just created, by simply clicking on the green SVG button or the blue TSV button.
Step 6: Save Genome Summary
Saving your genome summary gives you the ability to lock down your work and share it with other people (by sharing the URL). If you leave the page without saving the Genome Summary, it will give you a warning that you will lose your work. It is advisable that you save/name your genome summary first.
To save the genome summary, you need to choose a name for the selections. Click on Choose name, type in the desired name, and click Save Changes.
Now that your genome summary has been saved, you can come back in the future to view it or modify it.






2 thoughts on “Genome Summary”
Comments are closed.